
Shopping Buddy PWA (Progressive Web App)

Shopping Buddy is a simple shared shopping list that I have created to learn more about PWA. It is also built as a replacement for my original Android app of the same name. It uses Onsen UI for the user interface, couchdb as the backend database, and pouchdb as the frontend database interface.

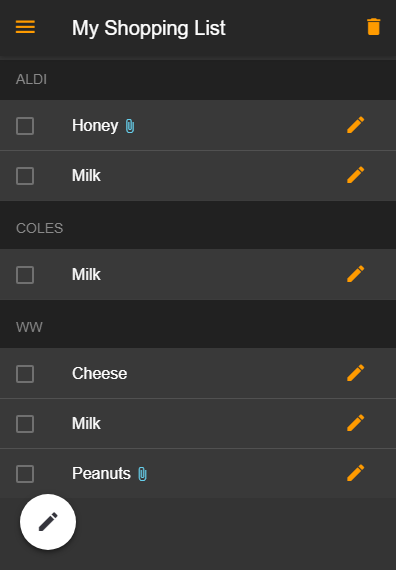
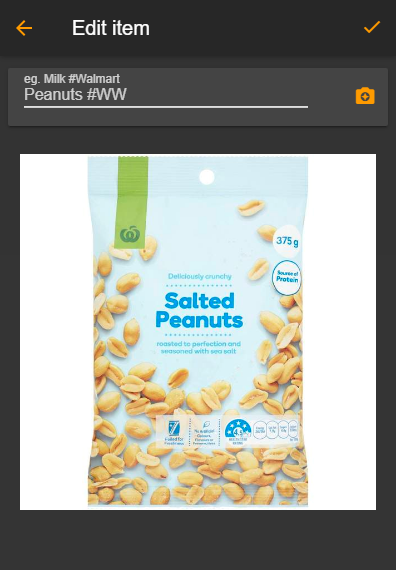
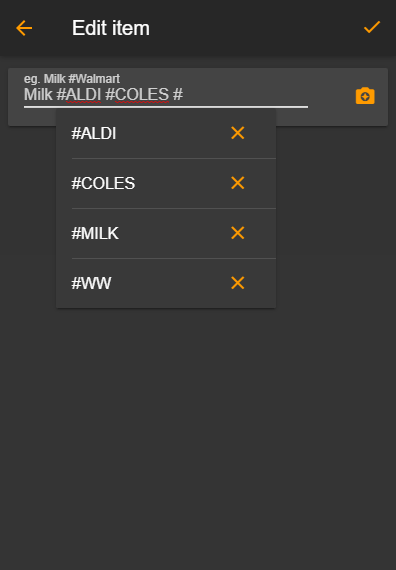
In short, this webapp lets you create shared shopping lists. Edits are synchronized in real-time across all instances of the same list. List items can be categorized via hash tags. Photos can also be attached to any list item.

The webapp has been tested on Chrome (Windows, Android) and Safari (iOS). Source code can be found on Github. Production demo is hosted here.


Comments

Popular posts from this blog

Update: Line adapter for Ozito Blade Trimmer

Update (Dec 2021): If you access to a 3D printer, I would now recommend this solution , which makes it super easy to replace the trimmer line. I have been using it for a few months now with zero issue.

Cooling mod for the X96 Air

I realized after my Ugoos box died that overheating is a big problem with cheap Android TV boxes. A teardown of the Ugoos box shows that it does not have any heatsink or fan at all!  The X96 Air does have a heatsink, but the heatsink is located at the bottom of the casing with no ventilation. In this default configuration, with the ambient room temperature at 25c and playing a 1080p video, I was seeing the CPU temperature at 67c. I drilled a couple of holes at the bottom of the casing. The CPU temperature fell to 59c with the box raised about 2cm with plastic blocks. I retrieved an old 5V laptop fan: Then cut and strip away a spare USB cable: Solder the red and black wires on the fan and the cable: Secure the fan to the bottom of the casing with double-sided tape, then plug the fan into the box's USB connector. Here's a view of the box with some 3D-printed risers installed at the bottom to give the mounted fan sufficient clearance: The CPU now runs at 43c, a huge drop from the ...

Installing and customizing CoreELEC in X96 Air

I previously installed CoreELEC on another TV Box ( Ugoos X3 Pro ), which unfortunately died after only 9 months during the summer (due to the unit overheating, which I learned is a common problem for cheap Android TV boxes). So this time I purchased a X96 Air  (4GB/32Gb) and had to do the whole thing again. So this is a note-to-self in case I ever have to install CoreELEC again on some other device. Installation of CoreELEC is simple enough by following this guide . Basically, it involves downloading and writing the firmware to a microSD card using usbimager . Then insert the microSD card, reset the unit and hold the reset until the logo appears. The unit will then proceed to boot into CoreELEC. First thing is to connect to WiFi, then enable SSH. This allows me to login via ssh and execute: ceemmc -x from the terminal. This writes CoreELEC to the built-in eMMC storage, after which I am able to remove the microSD card and reboot the unit into CoreELEC via the built-in sto...